Iniziate la procedura di installazione di Windows 11.
Arrivati alla schermata Connettiamoci a una rete dell’OOBE, questa non permette di proseguire in assenza di una connessione.
Premete Maiusc + F10 per aprire il Prompt dei comandi.
Digitate OOBE\BYPASSNRO e premete Invio.
Il sistema si riavvierà e una volta tornati alla schermata Connettiamoci a una rete comparirà la voce Non ho Internet.
Cliccate Non ho Internet e poi ancora su Continua con configurazione limitata.
A questo punto sarete in grado di portare a termine l’installazione con account locale.
Doppia WAN su Teltonika RUT 10X
Setting up second WAN interface
To change LAN port purpose to WAN you will have to perform changes in 3 different locations of RUTX10 WebUI
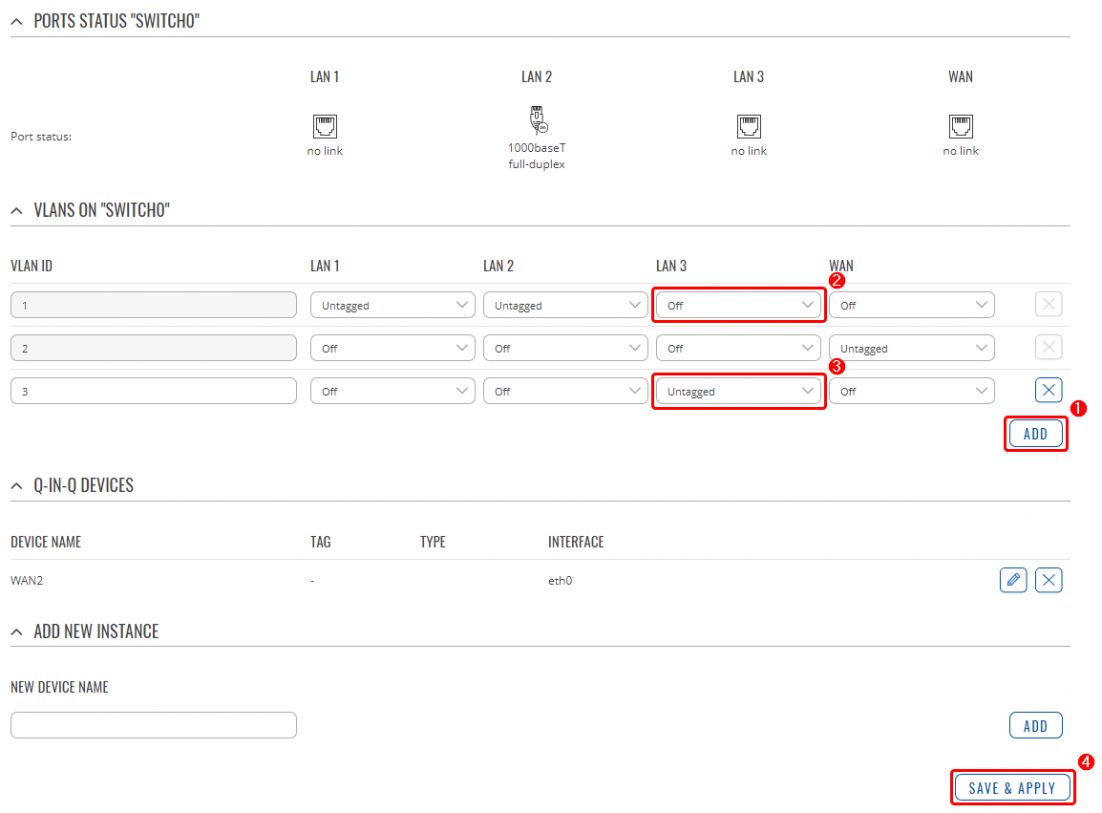
Creating additional VLAN
Go to Network > VLAN section in device WebUI and perform following actions:
Create new VLAN ID by clicking ADD button.
On VLAN ID: 1 (LAN interface), select Off from drop-down list, on port that you want to use as secondary WAN.
On newly created VLAN ID (3 in this example), from drop-down list, select Untagged, on same port.
After performing these actions press Save & Apply in VLAN settings.
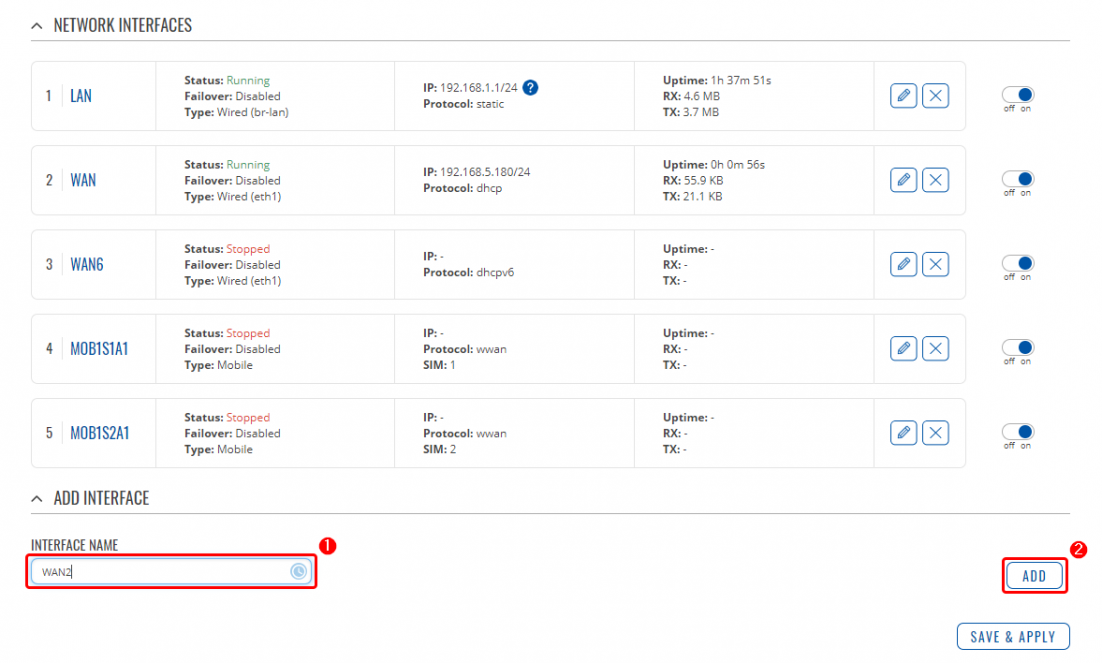
Add new WAN interface
Go to Network > Interfaces WebUI section.
Enter new Interface Name.
Click on Add button.
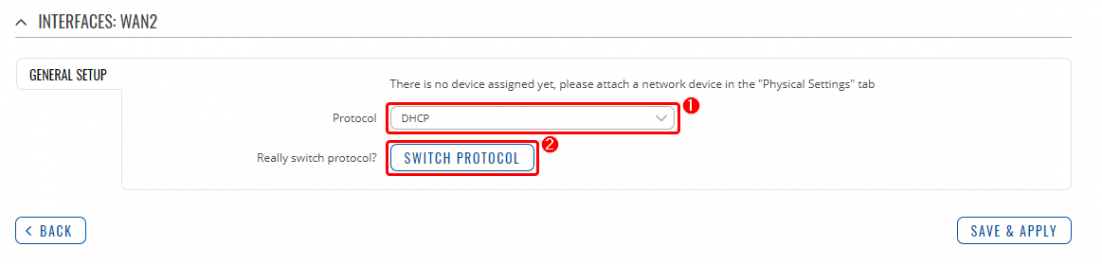
After doing that you will be redirected to new window to set up new interface, when there:
Choose DHCP Protocol from drop-down list.
Press on Switch Protocol.
After switching protocol More setting options will appear.
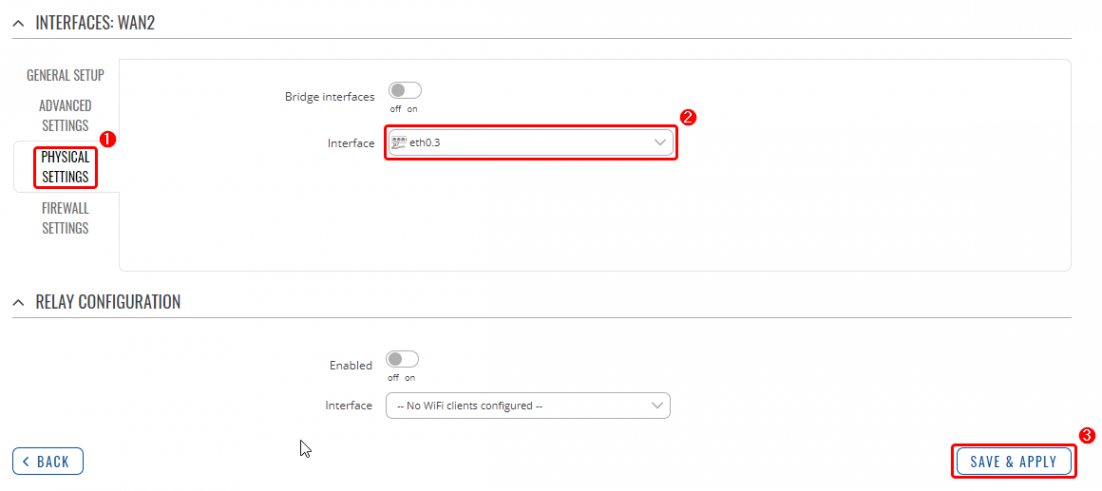
Go to Physical Settings.
From drop-down list choose previously created VLAN interface (in this example it is eth0.3)
Press Apply & Save.
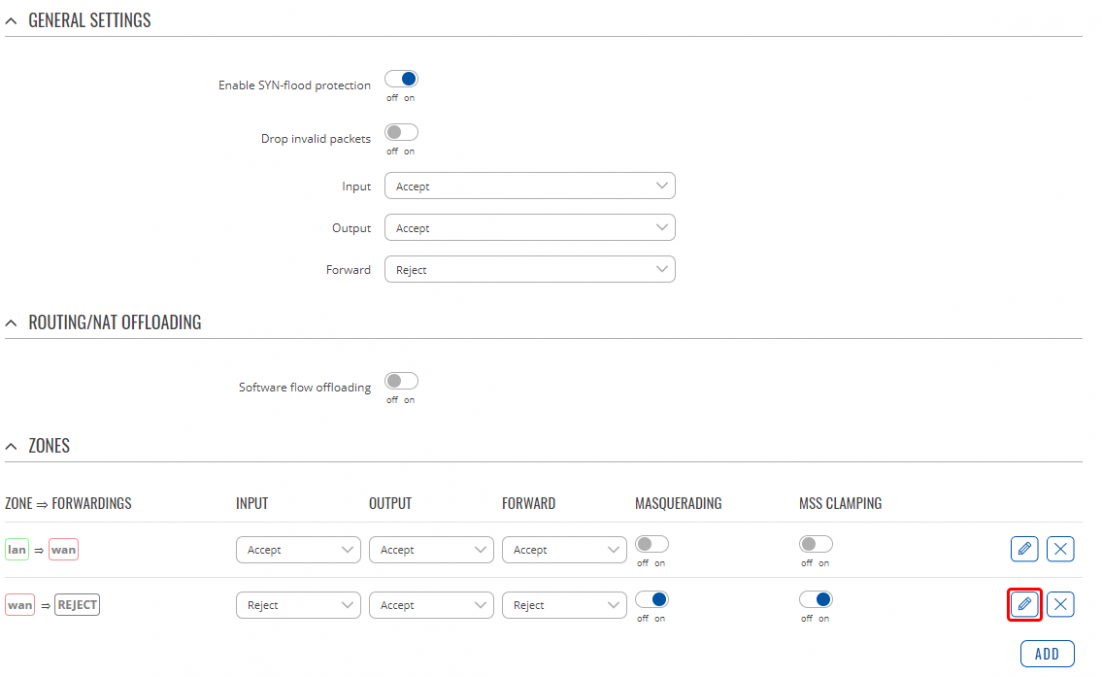
Set/Check Firewall
Go to Network > Firewall > General Settings WebUI section. Click on Edit button on WAN zone.
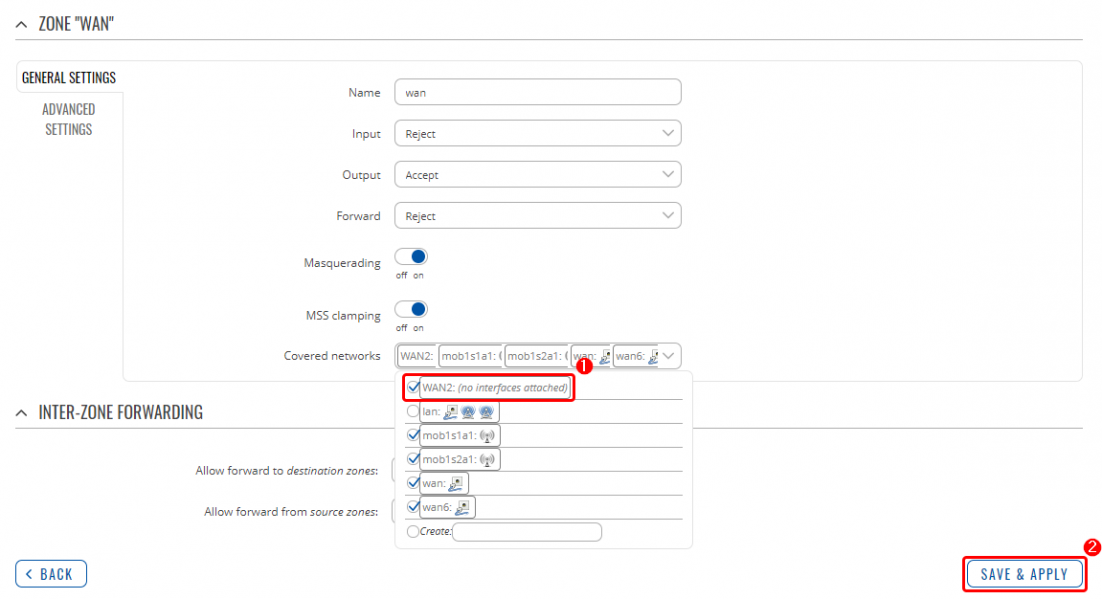
In WAN zone settings
Make sure that yours newly created interface is selected in Covered networks list.
Click Save & Apply.
Check new WAN interface
Insert WAN cable in selected port, go to Network > Interfaces WebUI section and if you followed steps correctly yours newly created WAN interface should be running and have an IP.
.htaccess per redirect domini su https
RewriteEngine On Rewritecond %{REQUEST_URI} !^/\.well-known/(.*)$ RewriteRule ^(.*)$ https://www.miosito.com/$1 [R=301,L]